How to Make Watercolor Postcards
Learning How to Make Watercolor Postcards is an easy and fun way to incorporate art into your everyday life. Enjoy this tutorial on how to make watercolor postcards as gifts, notes, and cards for friends and family.
* This post may contain affiliate links. If you purchase, I could make a small commission at no charge to you. Please read my Disclaimer and Privacy Policy HERE.

Last year at my live event, one of my favorite projects for the ladies was making watercolor postcards. They were so simple and fun! It’s a fun and heartwarming activity I’ve shared with the kids we support and visit in Honduras. We helped them create cards for their loved ones, and they absolutely loved the activity. So, I’m excited to guide you through the same process of crafting your own beautiful watercolor postcards. It’s a simple yet artistic way to brighten someone’s day, whether you leave them a special note or send them as “happy mail” to your friends.
Materials Mentioned
Supplies You May Need
Before we dive in, I wanted to share a few essential supplies you’ll need to make these watercolor postcards:
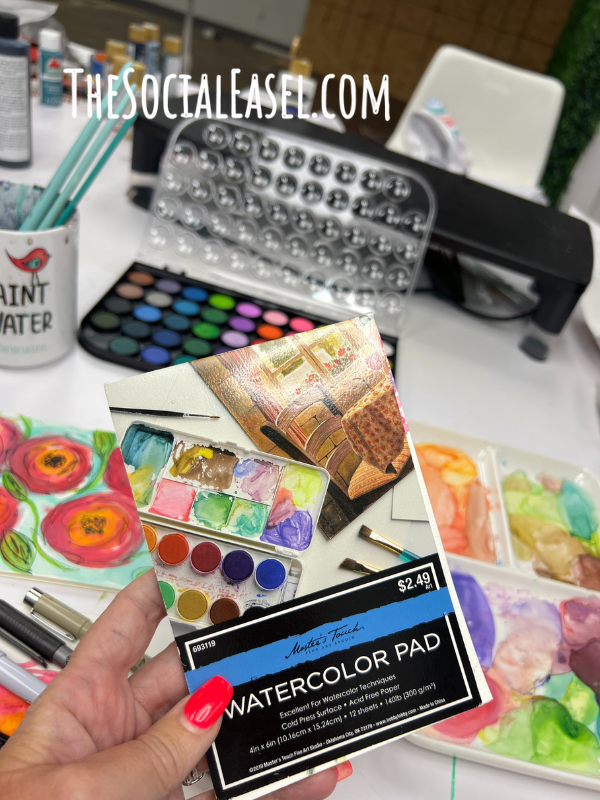
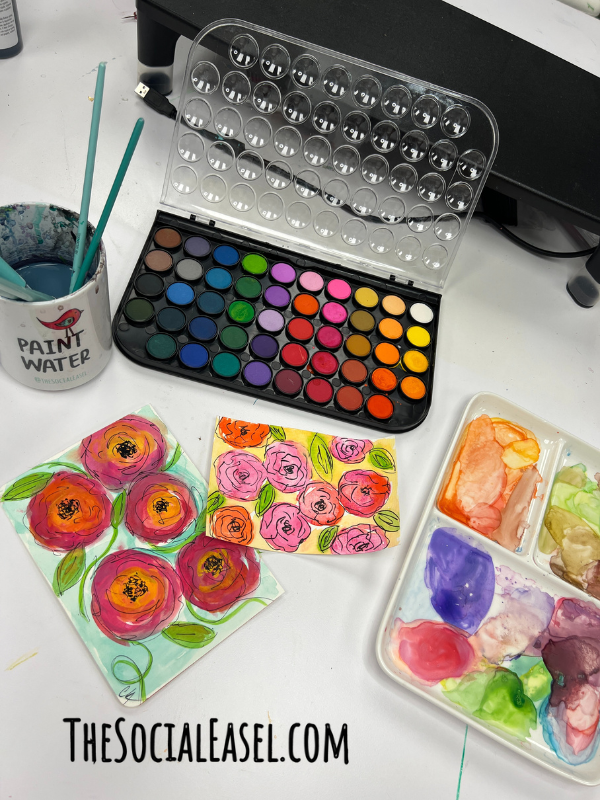
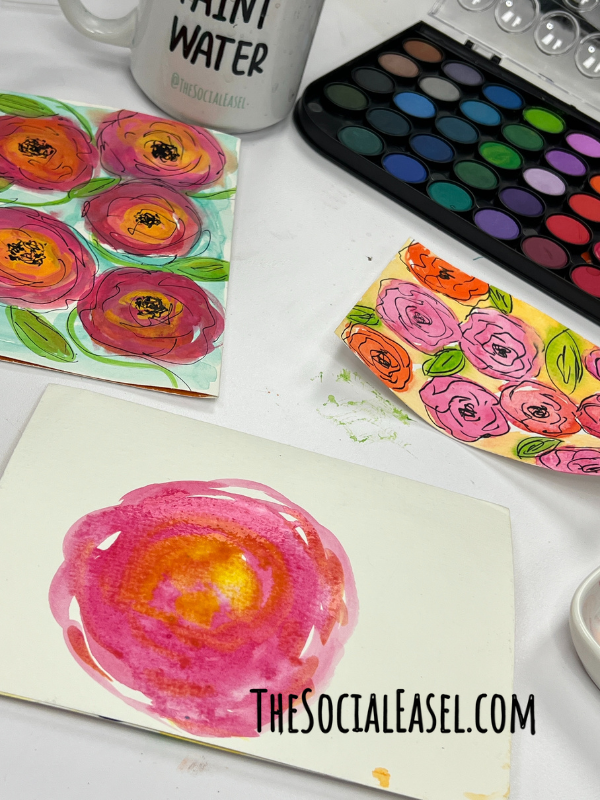
Watercolor Cards:
There are various brands of watercolor cards available. You have the freedom to choose between different styles, whether it’s traditional watercolor cards or folded watercolor note cards. Personally, I used some I found in my drawer from Hobby Lobby – the Master’s Touch watercolor pad, a four-by-six-inch size, usually priced at $2.49 but often on sale. You can purchase your own or you could always cut cardstock you already have on hand.

Watercolor Set:
I recommend using a reliable watercolor set, like the one I used in Honduras and here, which costs around $9.97. It’s an affordable option, especially if you’re new to watercolors.
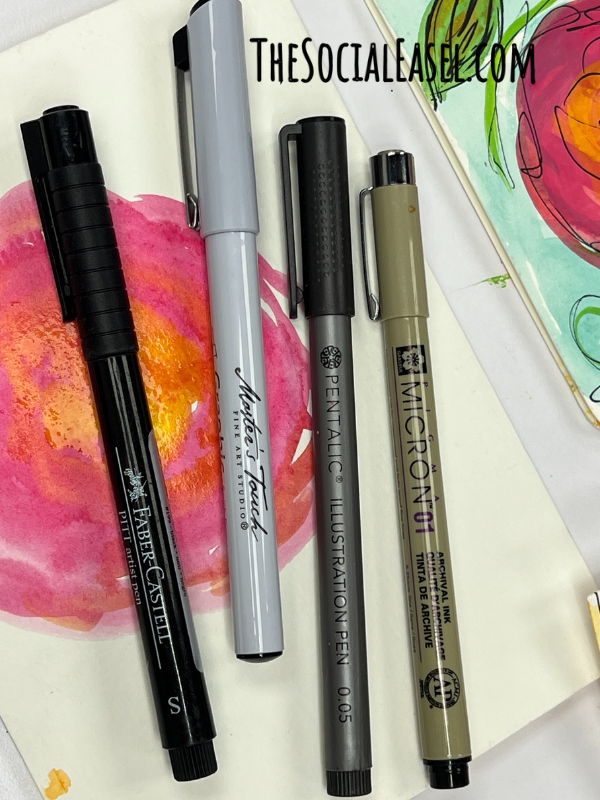
Pens:
You will want to have a few pens to work with. I used a waterproof pen, paint pen, and a brush tip pen in this tutorial. You can use whatever you have on hand or find some at the links above.
Step-by-Step Guide to Making Watercolor Postcards:
Step 1
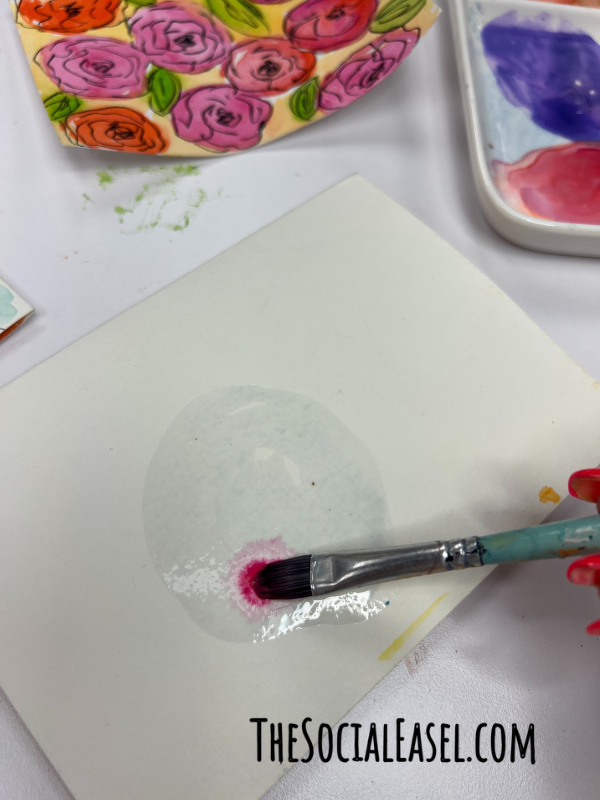
Begin by wetting your paper with a brush loaded with water in the round shape of a flower outline. You can do this by gently applying water in circular shapes on your watercolor paper. Let some of the water extend slightly over the paper’s edge so it looks like your flowers fall off the page. You can see a slight reflection of light in the photo above. That is the water that I put on the card.
Step 2
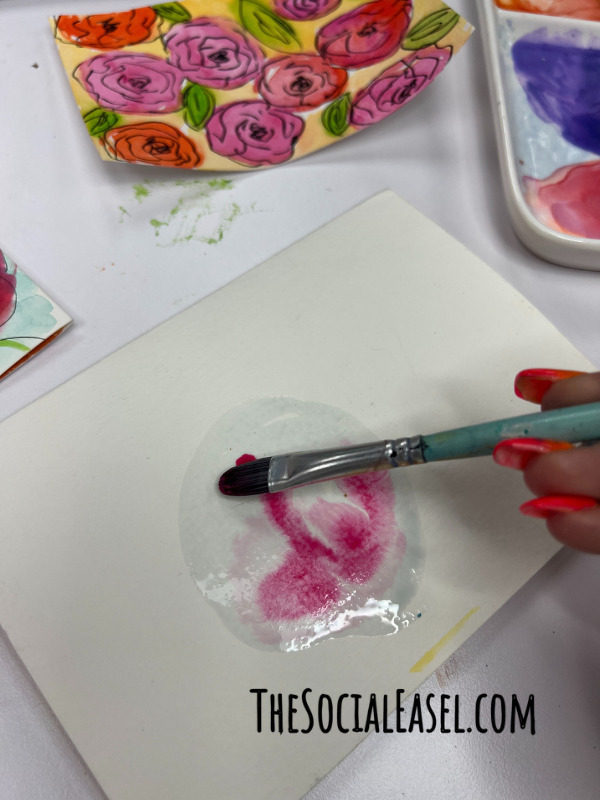
Next, use the wet-on-wet technique to add your chosen watercolor pigment. Drop the color onto the wet areas and let it flow naturally through the water you placed first on the postcard. While you are doing this, you want to leave some whitespace for your background.
You can experiment with different colors here. Don’t worry about achieving perfect circles. Imperfections add character to your postcards. Don’t be afraid to mix and match colors. You can layer shades, blend them together, and even add contrasting colors. Allow this to dry completely.
Step 3
After your flowers have dried, you can start adding some leaves and background colors using the wet-on-dry technique. Get a little water on your brush and dab that into your desired watercolor. For my postcard, I grabbed green to make some cute little leaves mixed into the flowers. These don’t have to be detailed. That will come when we add the penwork.
The less water you use the more pigmented your color will be, and the more water you get on your brush the less pigmented your color will be. It’s totally up to you! Let your creativity flow as you add these fun details. Don’t worry if the colors mix.
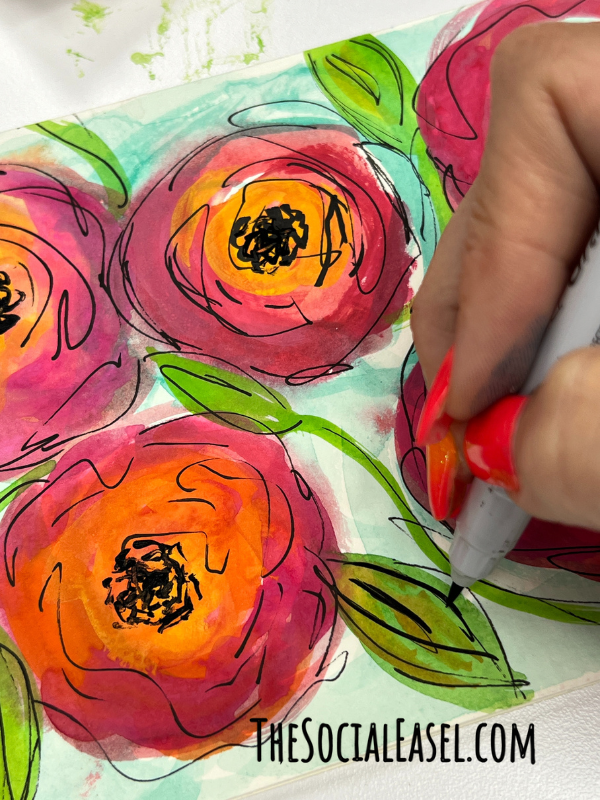
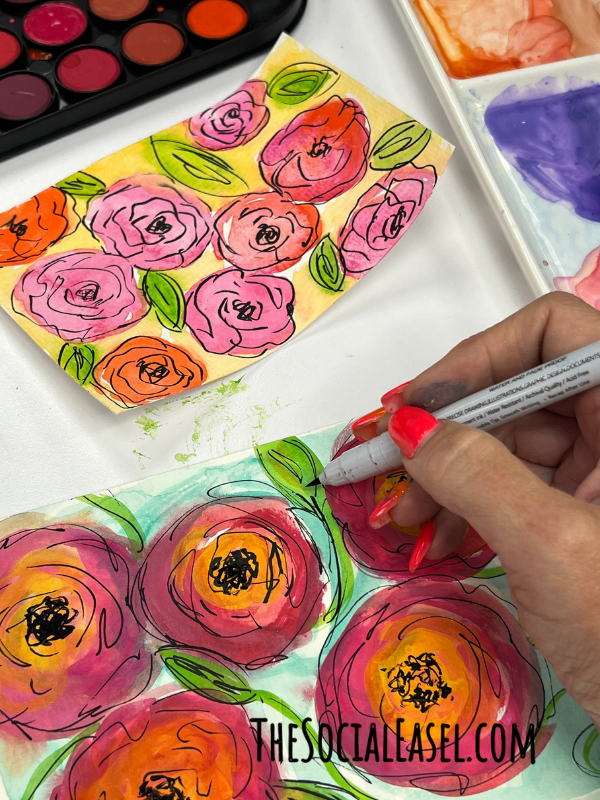
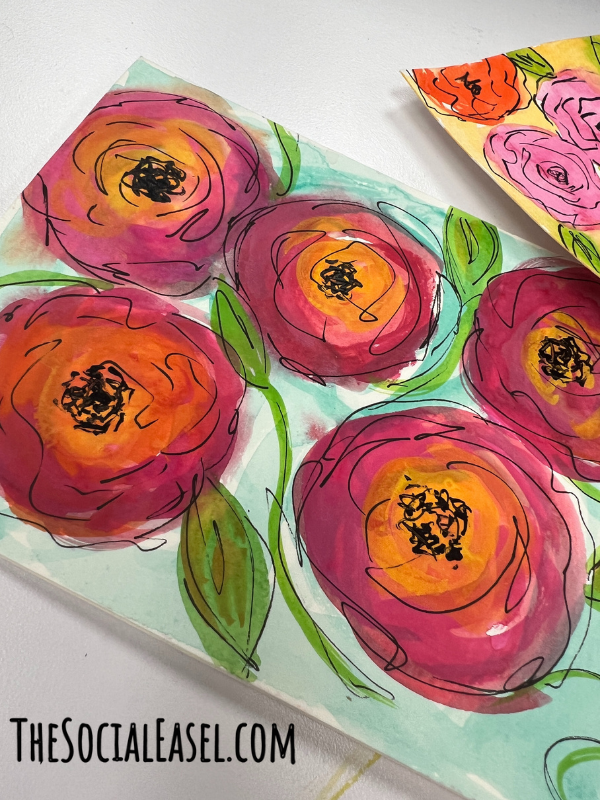
Step 4
After your watercolor masterpiece has dried, use waterproof pens to add details. Start with leaves and stems, using a sketchy style for a loose and artistic touch. You can also add center dots and additional lines for texture and whimsy. Feel free to experiment with different pen colors. I just used black, but white details would go great here too. If desired, you can outline your leaves and flowers to make them pop even more.
Step 5
You may find that your postcard tries to curl. You can easily flatten your postcard by placing it under a heavy book once they are completely dry. This will help flatten any slight warping that may occur during the watercolor painting process. You can leave it under the book overnight for a nice flat postcard in the morning.
Creating watercolor postcards is a wonderful way to express your artistic side while brightening someone else’s day. Whether you’re crafting cards for loved ones or swapping with your friends, the process is peaceful and uplifting.
In my Tribe, we often engage in activities like card swaps. This practice of sending each other “Happy mail” serves as a heartwarming way to connect with Tribe members and spread joy. Tribe is a great place to be for both art and sisterhood!
If you would be interested in becoming part of this amazing community click the button below to learn more about what Tribe is all about!

Tribe is an amazing private group where you can learn acrylic painting techniques to take your skills to the next level! Inside, you will discover an incredible community, get in-depth technique lessons, exclusive step-by-step painting tutorials, and gain access to over 150 videos in my video library! If you would be interested in becoming part of this amazing community click the button below to get your name on the list!
Watch The Watercolor Postcard Lesson:
Post a picture and share what you learned on The Social Easel Facebook Page!
Stay creative!!

If you would like to be notified before I go Live on Facebook with a fun art tutorial, text “Hey Friend” to 417-217-7044.